Saturday, June 25, 2016

SCA 50 Bloomery Smelt a la Wareham Forge

It was my great good fortune to attend the SCA 50 year celebration, and while I was there I spent a fair amount of time hanging out (and occasionally helping out) at the "Bloomery Iron Smelt" experiment that Darrell Markewitz ran.

It was the first time I'd ever actually been at the forge when the bloom was extracted, and I have to say I was pretty overwhelmed. I had to leave early Wednesday morning, so I'm not sure how the into-the-night reheat or next-morning compaction went, but I was glad to be there nonetheless.

Here's a short video showing some of what we did:


Hope you enjoy.

Wednesday, March 11, 2015

Upcoming events Spring/Summer 2015

It's been a busy six months, mostly working on chemistry rather than metallurgy, but metallurgy season is coming around, so here are some upcoming events you might want to check out:

Events in 2015

Early Iron IV
When: April 24-26
Where: Ashokan Center, Olivebridge NY, USA

Iron Smelting Course
When: May 24-26
Where:  Proton, CA

Prehistoric Metallurgy Class
When: July 3-6, Butser Ancient Farm
Where: Butser Ancient Farm, Chalton, UK

UMHA AOIS (BRONZE AGE)
When: Late July, Early August
Where: Skibereen Co Cork, IE

Friday, July 25, 2014

Assaying galena for silver

In which I create large quantities of a small molecule with unforgettable properties while simultaneously inventing a new Olympic Sport.

I was recently exchanging email with Fergus Milton (a most excellent Brit who teaches a class on copper smelting at Butser Ancient Farm) on the possibility of adding a unit on cupellation to the class. This jogged a memory and I recalled that I had purchased a quantity of galena some time ago. I hadn't had any particular drive to smelt lead, but now that I might get lead and silver out of the effort, I was moved to retrieve it.

The galena was in my Ore Storage Facility, known to the less appreciative as "that big dusty pile of rocks and bags of yet more rocks you keep behind the bar". After a time I had moved enough of the contents of the OSF to identify the correct unlabelled tan canvas sack which contained my galena. I towed it over to the scale and learned that I had almost exactly 7.5 kilos of the stuff.

Now we all know that some galena is argentiferous and some is not. Having been (to date) unsuccessful in coming up with a decent excuse to blow the cash for an X-Ray Fluorescence analyzer, I was seemingly left with two alternatives: Send the sample off to a lab to have it analyzed, or do a smelt & cupel, trusting that I'd get it all right the first time, and find the silver if there was any. Neither appealed.

Then I had a thought. (This happens more often than I like.)

Like any aspiring mineralogist, I have some hydrochloric acid for identifying metals in rocks. Lead chloride is soluble. Silver chloride is not. It should be a simple matter of dissolving the galena in hydrochloric acid and watching for an insoluble precipitate. Silver chloride has some well-defined characteristics, so it should be easy enough to confirm the silver and estimate the silver content of the original lead.

Being a Man Of Action, I grabbed the jug of acid and a handful of galena and headed to the kitchen. I tossed the galena in a glass pie pan and promptly poured some acid over it.

I can hear the chemists in the crowd wincing.

Now the chemistry I had concerned myself with was fairly straightforward:

   PbS + Ag2S + 4HCl = PbCl2(aq) + 2AgCl(s)

But this is not a balanced equation, since it doesn't account for the hydrogen or sulfur on the left hand side. A correct and balanced equation looks like this, with aqueous, solid, and gaseous products:

   PbS + Ag2S + 4HCl = PbCl2(aq) + 2AgCl(s) + 2H2S(g)

Anyone remember hydrogen sulfide? The more enterprising among you may have produced it in stink bombs when you were kids. It has an eye-watering odor of rotting meat crossed with severe flatulence. It's also flammable and quite toxic, but I can personally assure you it's the odor that will speed your pace when clearing the area.

Flash forward in time five minutes. Every window in the house, as well as the front and back doors, are wedged fully open. Every fan in the kitchen, lavatories, and HVAC system is on "high". The pie pan has been transferred to the backyard.

Ever try to run through your living room while squinting and holding your breath? While carrying a pie pan full of corrosive liquid which is actively producing toxic gas? Getting the sliding glass door to the backyard open under these conditions yields a difficulty rating of 6.0. I believe I have a new Olympic Sport in the offing.

Happily hydrogen sulfide is a small and (mostly) hydrophobic molecule, so once it's cleared, it's cleared. It doesn't linger. At that point it's only a problem for the people downwind of you.

The adventure over, I was able to discern that my galena does in fact contain silver. Stay tuned for an account of smelting lead and cupellation of silver.


Postscript:
DANGER: Usually in metallurgy the worst thing that could happen to you is a disfiguring burn. This is different. Every one of the reactants and byproducts of this reaction are toxic to humans. Don't even start this unless you know how to handle and dispose of them safely.
For those qualified to do this properly, the stochiochemistry follows: Galena (lead sulfide) has a molecular weight of 239. Lead chloride has a molecular mass of 278 and a solubility of 10g/L in water. The acid I used is 31.45%, 20° Baume, or 8.5molar hydrochloric acid.
Scaling everything for 0.036 moles, we get the following values: 8.6g of lead sulfide + 4.3cc of 8.5M hydrochloric acid + 995.7cc of distilled water results in 10g of lead chloride dissolved in 1L of water. Excess acid and/or water will assure only the silver precipitates.

Thursday, February 20, 2014

Not dead or dying

Despite the dearth of posts in 2014, this blog is not dead. I've just been involved with experiments involved in other disciplines. (See my paleotechnology and paleochemistry blogs via the links above for more info)

Sunday, June 30, 2013

Bronze age bellows a la Brenda Craddock

Brenda Craddock taught an excellent unit on making primitive bellows on the second day of the Butser archaeometallurgy course, and this is an attempt to capture some of that excellent teaching.

The bellows pattern used was referred to locally as a "Roman Kite Bellows", although I've been unable to find that term used elsewhere. Brenda confirmed that "No one actually knows what bronze age bellows looked like.", but her design is intentionally "As simple as possible" and based on "later descriptions and depictions" of them.

The bill of materials is relatively short:
  1. one large tanned goat skin
  2. one hollow nozzle (we used a segment of bamboo)
  3. two short, smooth, regular, handles (dowels work)
  4. leather awl with thread
  5. a few feet of rough twine
  6. (optional) gelatin glue
The bellows pattern (figure 1 below) itself was designed to fit into an animal skin with maximum utility, with the narrow bit to the left terminating at the scruff of the neck, and the rounded section on the right straddling the tail and haunch. The rest is made as broad as the hide will allow. Caveat: I was unable to trace her pattern directly, so this is a projection from some images captured during the class.


Production


General notes

  • The bellows are produced such that the handles have the rough/suede side of the hide on their outside, so that they seal suede-against-suede rather than smooth-to-smooth. This gives a better seal, which is essential.
  • The bellows can be fashioned such that the seams are on either side, although in this class all the bellows we produced had the seams on the outside.

The foot

See figure 2a. The hide is bent slightly along the A-B line, then points C and E are brought together. The edges A-C and A-E are sewn together starting from point C/E and progressing toward A, so as to avoid any misalignment. Then points D and E are brought together, and sewn as above, from the point D/E toward B. Lastly, a small triangular gusset is sewn into the V formed by the edges CF and DG. The result should look something like figure 2b.

Fig 2a Fig 2b


The snout

See figure 3a. The hide is curled around the A-B line, joining point C with E and D (roughly) with F. Sewing proceeds from point C/E toward point D/F, so that the joint at the handle tabs is clean and any discrepancies occur at the snout. Figure 3b shows the curl and the point from which to sew.

Fig 3a Fig 3b


The handles

As we mentioned before, the hide is wound around the handles such that the rough side is on the outside to provide the best possible seal when used. Once the handle sleeves have been sewn, the handles are inserted most of the way into them, and the bottom of both sleeves are pinched together and sewn flat to prevent air from escaping from the joint. Figure 3b above shows the measuring for this process. Figure 4 shows the bellows at this stage.

Fig 4


The vent

The hollow vent for the bellows is placed in the "snout" of the hide we have sewn. It may be liberally coated with gelatin glue, as may the inside of the snout. Then a meter of twine is wound about the joint between the two. The twine is laid so that its midpoint is beneath the snout/vent joint (see Fig 5a), then wound from both sides. It is single-knotted at least every other winding to prevent slippage, then tied securely when the ends are reached. Fig 5b shows the completed tie. Note that there is considerable linear coverage along the joint.

Fig 5a Fig 5b


Usage

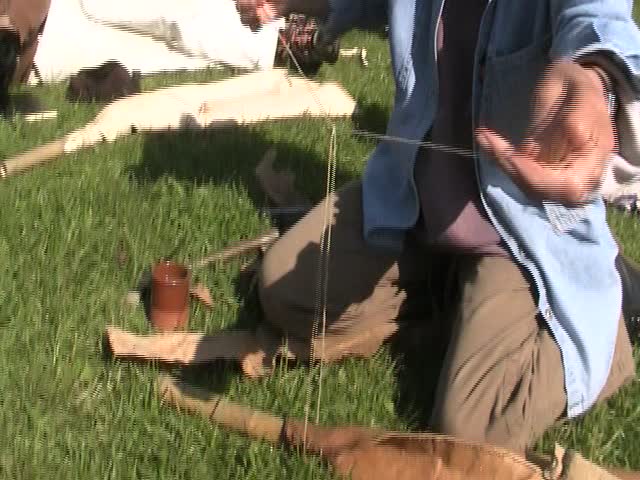
Here is Ryan Watts, a classmate, using the constructed bellows:


Airflow

We measured the approximate air displacement of a single push of the bellows and arrived at a volume of 1.4 liters. With an average of 1.25 pushes per second over an hour long session, we get an airflow of 105L/min. Vigorous pumping increases the pushes per minute but usually decreases the volume per push somewhat. It would be extremely difficult for someone to sustain over 200L/min for an hour.

Conclusions

  • The airflow is easily sufficient for artisinal production of gold, silver, lead, mercury, copper, and tin. It is doubtful whether a single bellows of this type would be sufficient to smelt iron.
  • Given a good leather awl and all the materials required, a bellows of this type could probably be constructed by an experienced craftsman in less than two hours.
  • The materials required could largely be taken from a single animal (Brain-tanned hide, gut/sinew thread and twine, bone nozzle)
  • Considering the number of materials, parts, and processes required to make them, a bellows might be among the most complicated tools on a bronze age farmstead.

Friday, March 29, 2013

Upcoming events

May 24-26: Ontario, Canada
Darrell Markewitz, author of Hammered Out Bits, is teaching an iron smelting class, where I hope to smelt my first iron ore.

May 31-Jun 3: Hampshire, UK
Fergus Milton at Butser Ancient Farm is teaching a four day archaeometallurgy class covering copper and bronze smelting. I hope to walk away with a cast axe head.

Jun 14-16: London, UK
The Historical Metallurgy Society is having their 50th anniversary conference.  I have just paid my membership and registration fee so that I may attend.

I also plan to visit Malta and Morocco, so if anyone knows of any events related to early mining or metallurgy in or around those places, please let me know!

Wednesday, January 9, 2013

Success, sort of.

A second three hour high-heat smelting reduced the contents of both crucibles completely. The copper came out as a single large button. The tin was different. There was one small button (5g) and a three layer "cake" of slag... a light grey very granular layer was the bulk of it. Atop that was a dark grey layer and atop that were little balls of tin, like a froth, embedded in the borax.


In researching the tin, I find that tin forms a significant amount of tin silicate slag, given the chance. Historically quicklime was added to displace the tin from the silicon. I will try that next time. 40% of the mass of the cassiterite in quicklime is the proportion recommended.

Saturday, January 5, 2013

2013 begins: Smelting in a kiln

I got a Cress kiln a while back. I refitted it with a (much, much) longer cord, and here's what it looks like now:


I tried smelting copper and tin in it today, using crushed charcoal as a reducing agent and borax as a flux and sealant.

Crucible 1:
100g cassiterite
 10g powdered charcoal
  5g borax
Crucible 2:
 70g malachite
 10g powdered charcoal
  5g borax
Both crucibles were covered by ceramic discs that fit loosely.

I heated the kiln on "low" for about 30 minutes, "medium" for about 30 minutes, and "high" (dark orange heat) for 2 hours, then reversed the process for cooldown, for a total of about a 4 hour total firing. When I pulled them out, imagine my surprise finding only partially decomposed ore, and plenty of charcoal left. The copper was considerably further along than the tin in terms of decomposition, but neither had a substantial lode of purified metal.

Tomorrow, I shall extend the time for full heat from 2h to 3h and see what's what.

Wednesday, May 23, 2012

A new quest: Bellows without tanned leather

In a moment of idle curiosity, I wondered whether you could make a practical (historic) bellows without tanned leather or woven cloth. It occurred to me that perhaps you could use something already flexible that did not need not some days-long chemically complex tanning process nor a tight warp loom to produce.

How about an animal bladder? I know they were used for two purposes in-period: as a bag for light items by the first peoples of North America, and as a balloon by dark ages Europeans. Are they large enough? Robust enough? Anyone ever heard of a bladder-based bellows?

Any other ideas are welcome: any animal, vegetable, or mineral alternative to tanned leather and cloth is a possibility.

Period references are of course extremely welcome. Please! Inform me!

Friday, May 11, 2012

Tin prospecting in New Mexico

About a month ago I scheduled a trip to New Mexico to visit an online friend named Ted French, who runs a mineral shopin Hillsboro, NM. He had offered to be my guide up into an area called the Taylor Creek Tin District where you can dry-wash for tin ore.
Strange as this may seem to most people, I liked the idea, so I flew up to Albuquerque this past Monday, and spent Tuesday up in the Gila National Forest with Ted.

  • We turned off US-25 onto New Mexico 52
  • We turned off New Mexico 52 onto County Road 59
  • We turned off County Road 59 onto Forest Service Road 2226 (or something)
  • Then we just turned off the road entirely.

On the "New Mexico 52" part we drove past a sign that said "Continental Divide".  Kinda cool. On the "County Road 59" part we drove past a sign that said "Fire Hazard Risk: Extremely High". (Picture on right) Also kind of cool. Tellingly, there were no more signs after that.

Ted drove us through the pine-needle-carpeted forest to an unremarkable spot, and we got out of our trucks. Just over the hill was a dry creek bed that was our destination, and we walked up the bed togetther, with him pointing things out and giving instruction as we went.

We reached a a spot that suited Ted and plunked down our gear. He handed me a 35mm film container and a pair of huge tweezers. He note again which colors, textures and density of material I was looking for, and turned me loose. It was pretty plentiful. Tweeze-plunk, tweeze-plunk for several minutes, each "plunk" a pebble of tin ore. Meanwhile, he was scouting the next "good spot" and when I'd run dry I'd catch up with him and he'd get me started again. Shockingly it was pretty much that easy. I tweezed around an ounce fairly quickly. Ted could prospect faster than I could recover the material, so he started gathering ahead of me: finding the next spot for me, then a spot for him. In the time it took me to gather an ounce or so, he'd prospected ahead for both of us, tag-teamed the gear forward, and had time left over to recover... about 5 ounces. I am but dust. 

During this time, the bright blue skies clouded over a bit, and we had a couple spritzes of rain. After the third spritz, when we'd been up there three hours or so, I decided that my two goals: first, to estimate how hard this task was, and second to gather a smeltable amount of tin ore, had both been accomplished. The rain was a bit dissuasive, so I was ready to go. Ted agreed, and just as we were starting to gather up the gear, it started to spritz again. By the time we had the gear rounded up, Ted was looking at the ground with a surprised expression.

"Is that white?" he asked. I held out my hands, and raindrops filled with a substantial amount of snow were hitting my arms. "That's sleet!" he said. "Cool weather!" I offered. We both grinned.

Then the thunder: loud and close at hand. Our smiles faltered. Up until now, "Thundersleet" had been a term with which I was unacquainted, but no longer. Thunder itself is not really scary, but its implied progenitor, Lightening, is a bit of an adrenaline rush when you're miles from the road, in a pine forest at 8500ft elevation, and distinctly remember a forest service sign saying "Fire Hazard Risk: Extremely High". Just imagine the thrills of a lightening strike between us and the roadway!

Happily, the Thundersleet ceased within a few minutes, just as we arrived back at the trucks.

Less happily, it was replaced with (I am not making this up) thunder hail. Not seed- or pea-, but marble-sized hail poured down on us. The very loud and continuous clatter was overwhelmed occasionally by peals of thunder that (since we were at elevation, and quite close to the source) were that very loud sizzly-crackley thunder rather than the deep bass rumble you get when you're farther away. The hail was coming down so fast that by the time we got to the main road, we weren't driving on individual hailstones, but on a fairly well established half-inch-thick layer of hail on the road. I was quite glad that I'd decided to go with the added expense of real 4-wheel drive on the rental truck. One point for the rookie!

Video of the hailstorm
I relaxed a bit when we reached the actual blacktop. For a moment, picture yourself thinking of "Driving a big 4 wheel drive pickup truck for the first time, on a layer of hail, on a back-country county road" and being relieved.


I finally thought to take some video of the hailstorm after it had started to wane a bit.


The next odd bit was that when we passed the sign that said "continental divide" the sky was bright blue and there was no precipitation of any kind. The whole storm was trapped on the western side of the mountains. The rest of the drive home, or in my case to Albuquerque, was downright boring.

... and it's clear skies
Then we cross the divide...


The net-net is that I came home safely, with enough raw tin ore to fiddle around with, having gathered the ore myself and gotten a feel for how hard that was to do: Mission Accomplished. The weather drama and new vocabulary were just a bonus. 
 

1 Oz Cassiterite
Cassiterite.
About 1oz not counting the big lump.


Fitting in in New Mexico

Now, off to crush the ore and smelt some tin!

Tuesday, April 24, 2012

The Historical Metallurgy Society

If you're reading this blog, you will probably be fascinated by this document from  The Historical Metallurgy Society: "Metals and Metalworking, a research framework for achaeometallurgy". It's the best guide I've seen available online, bar none. You may even want to become a member.

Saturday, July 16, 2011

Help finding malachtie source in the middle east

I lifted these images of a wide Malachite vein from a youtube video. The location is somewhere (according to the video, very remote) Middle East. Anyone know if there are human-accessible veins like this anywhere in the US? I'd happily pay a mine/claim owner for permission to take a few kilos from the ground myself.


Monday, July 5, 2010

Terminology: Furnace, Forge, Kiln

Just to keep myself from going crazy with these terms, I looked them up to find out which one meant what. According to Merriam-Webster...

A furnace is the most generic term:
 : an enclosed structure in which heat is produced (as for heating a house or for reducing ore)
A kiln narrows the uses to which the heat is put:
 : an oven, furnace, or heated enclosure used for processing a substance by burning, firing, or drying
A forge narrows the thing being heated to a metal:
: a furnace or a shop with its furnace where metal is heated and wrought
So while most of the things I discuss here could use any of these terms,  I'll try to use the term furnace generally. Of course the dictionary only records the current meaning of things, so older texts may contradict.

Monday, June 28, 2010

A few more kindred spirits

Hammered Out Bits continues to provide good iron smelting data at a tremendous rate.

Lee Sauder and Skip Williams have a good page of iron smelting links at The Rockridge Bloomery. (Mel Brooks movie quotations aside)

The Early Mines Research Group has an ongoing smelting effort as well, check out the "experimental archeaology" and members-projects links.

It looks like a lot of different people are (or recently have been) interested in early metal smelting re-creation, and I would love it if whoever catches the bug next had an easier time finding resources than I did, so please: send me your references.

Sunday, June 27, 2010

Kindred Spirits

Some other folks are thinking along the same lines here, and I wanted to put up some links to their work as well.

GrendelFish aka Matthew Dockrey recorded a couple of copper smelting expirments (experiment 1 ,  experiment 2)

Tim Young at GeoArch has been running experiments and recording data for a succession of iron smelting efforts from 1998 through 2007.

Paul French is starting a wikipedia entry that looks very promising.

Butser Ancient Farm has their 2010 workshops posted, and Making Metals with Fergus Milton on August 14 looks pretty interesting.

See something else that needs to be on this list? Let me know!

Thursday, June 17, 2010

Think like an engineer: Cheat!

Faced with several smelting failures, I decided to apply one of the sacred tenets of practical engineering taught to me by my father: "When it won't work, cheat". I swapped out the clay forge for one made of loose-stacked firebricks, solving my spalling and insulation problems at a single blow. I was confident charcoal with forced air could get me the temperature I needed if I got a working geometry for the forge. Here's what I ended up with:

[edit post to add picture here]

Additionally a more knowledgeable copper smelter from the other side of the Atlantic Ocean, gave me some good advice about how to test for what was going wrong. (Thank you Fergus!) Armed with this information, and general his encouragement, I took another shot.

On Wednesday, 16 Jun, 2010, I completed my first copper smelt. Here's a short (and very self-important) video of the results.

I plan to do another smelt tomorrow, on a slightly larger scale, so I'll take pictures and video, and post them.

Tuesday, June 1, 2010

Stack furnace v1.0: high firing

Not to ruin the ending for you, but this is where stack furnace 1.0 started to go south. The previous day I had run two wood fires through to burnout in the forge, with no ill effects. Today I planned to do charcoal and forced air. While I had purchased bellows for this purpose, an acquaintance suggested that I just get a heat gun and some dryer duct from the hardware store, and start with that. Being short on time before my trip, I decided to go the surer route, and bought the gear.


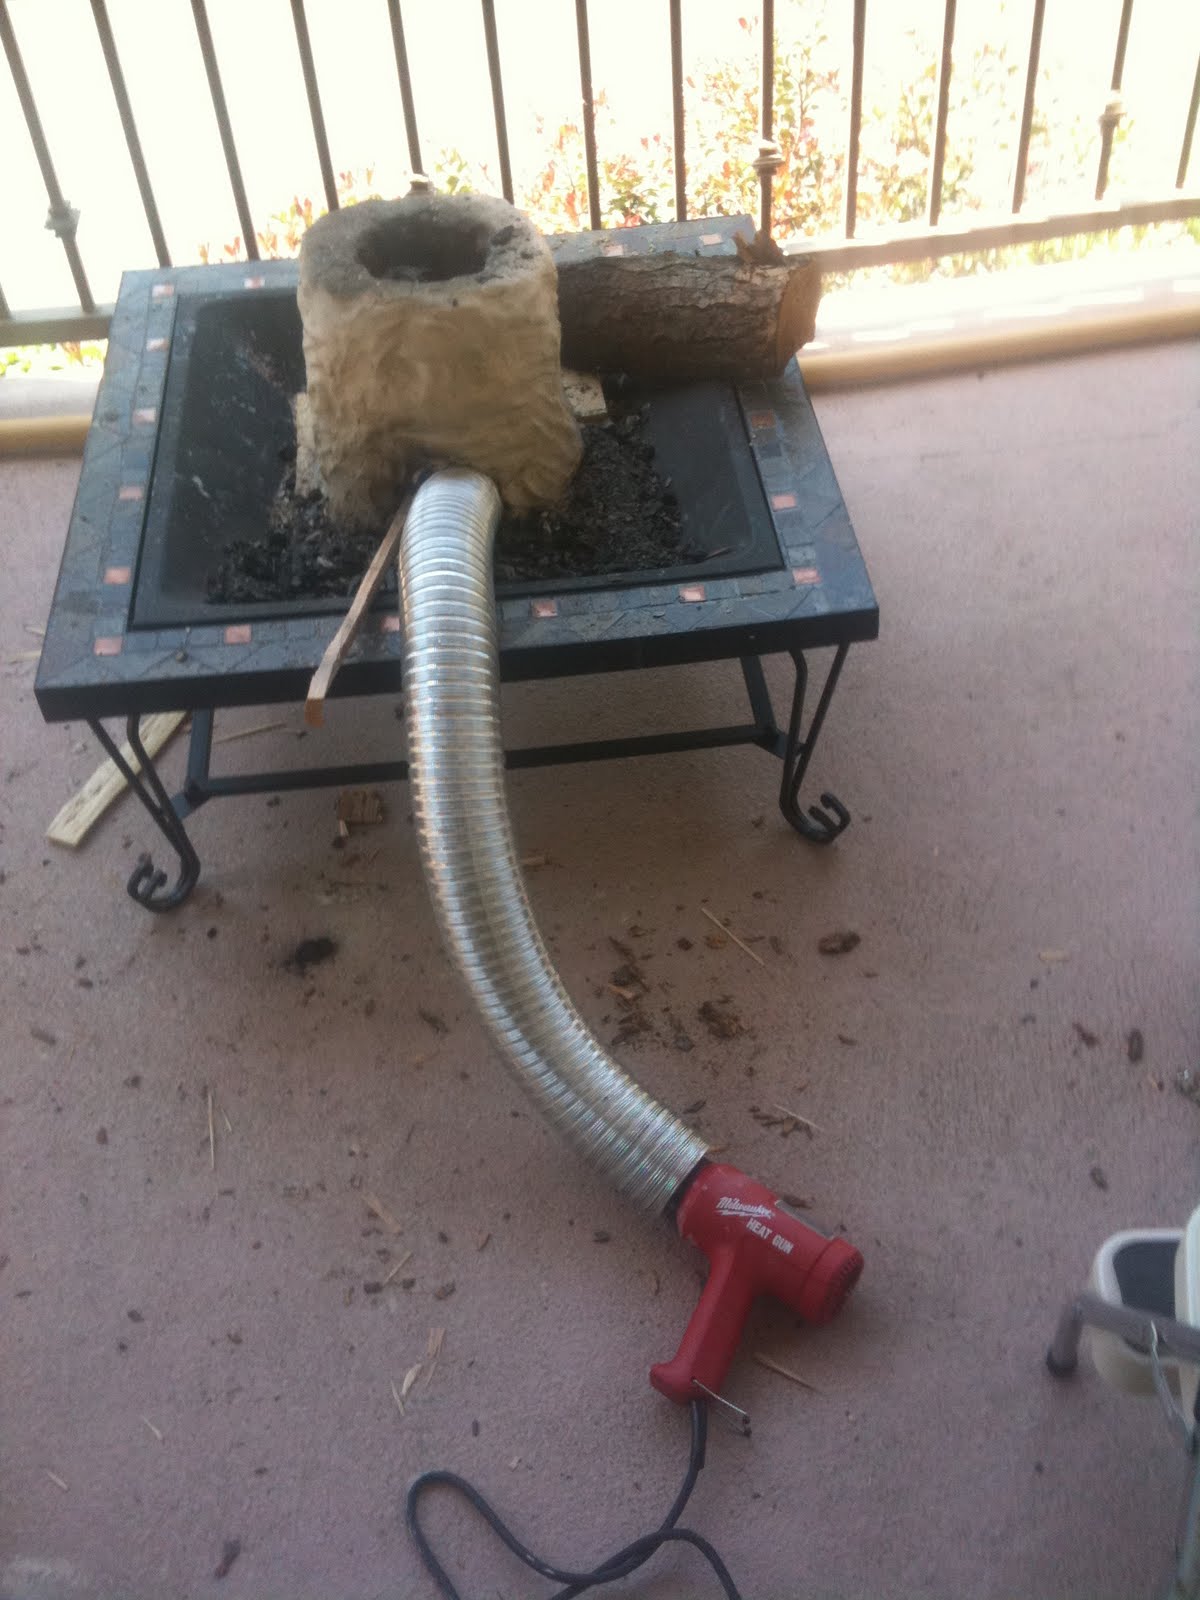
The setup turned out to be quite easy. I loaded the furnace to the brim with charcoal, lit the pile from the bottom, used a wooden wedge to keep the duct in the tuyere, and sat down to watch, periodically removing the vent to reload the charcoal.

At the beginning of the first reload, I began to hear a curious sound, a lot like popcorn popping. Those more knowledgeable readers will be wincing right now, but after checking that there were no cracks or faults developing, I assumed it was some impurity in the charcoal and blithely continued. The next odd symptom was that the ash didn't seem to be burning as completely. There was a large accumulation of unburned crap in the bottom of the forge, and it continued to grow as I fed more charcoal into it.

The third symptom was clear, however: the edges of the tuyere cracked and widened it to about 200% (and later 300%) of its original size, causing the duct to drop out. At this point, with the better view into the forge afforded by the (now quite large) tuyere, I could see that the accumulation of "ash" was actually an accumulation of spalled clay. The popping noises were caused by fire-hardened clay cracking off as less hard (and still wet) clay behind it generated steam and popped it off.

The clay body was still too wet, and I was eroding my forge from the inside out. Below are some pictures of the whole thing, the inside, and a close up of one "edge" of the tuyere


Well, I was ready for my vacation anyway :)

Stack furnace v1.0: low firing

After three days of drying indoors, then getting a good friend to help me get this back onto the patio, I split up some firewood into kindling sticks for the first (low) firing:


My current plan is to build a small fire inside the forge using just some kindling, and let that burn out. When that's cooled a bit, I'll start a second woodfire using logs, and let that burn for a while. A simple wood fire with no forced air isn't going to vitrify the clay, so this is an exercise in driving off water. Again, I can't find much in the way of advice on how to dry thick hunks of clay, so I'm flying blind.

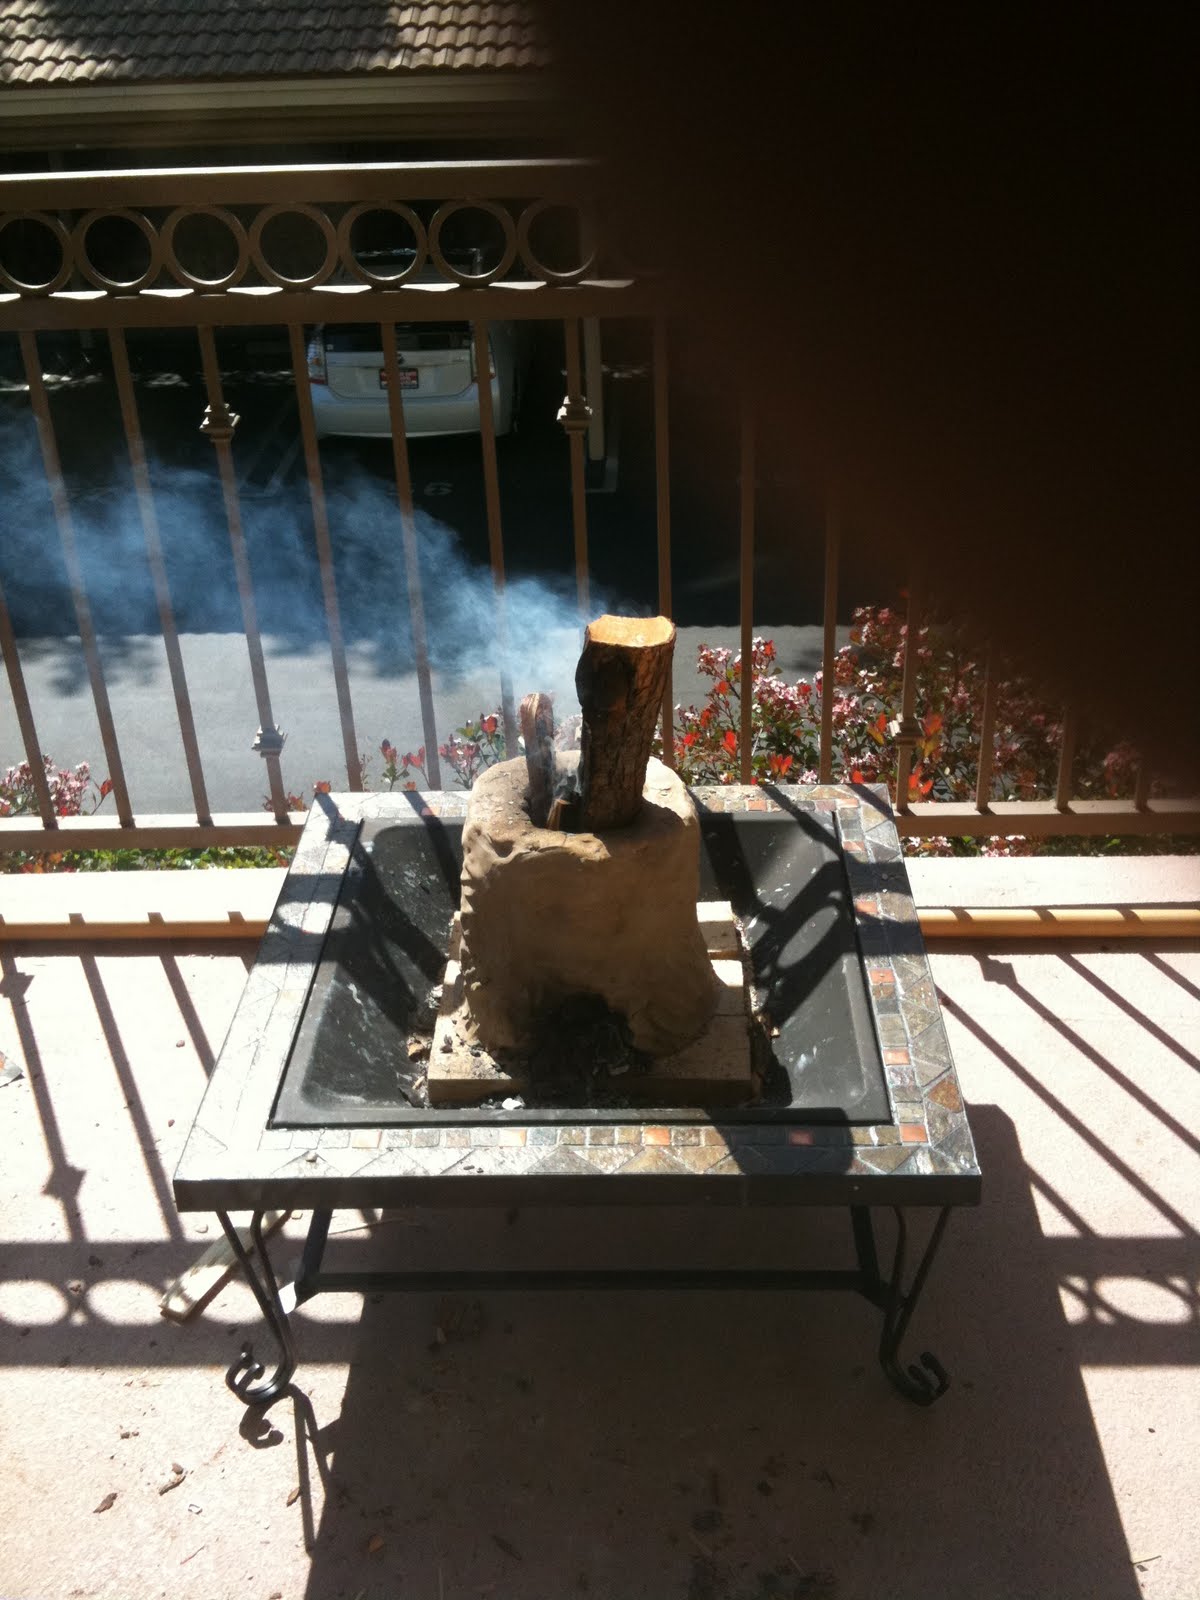
Yes, it's on fire, but you can't really see it because the sun was quite bright that day.


Burn 1 went to completion without a hitch: no spalling of the clay at all, and a nice hard surface resulted on the inside. Round two, with the bigger logs, begins.


This also went well, although it took a lot longer than I'd hoped. To keep the fire "in" the forge, I had to keep chopping away at the lower parts of the wood to get them out of the way so the fresh (burning) wood was below the top.


As you can see, the second firing went well. There was either a little spalling, or there wasn't any, and I just cleaved off some loose ash/clay when cleaning the coals, but either way, there are no cracks or major cleaves, so I'm ready to move on to the High Firing!

Stack furnace v1.0: The claywork

Now based on several articles, videos, and some photos found online, I've decided to build what I think should be termed a clay stack furnace. I will create a small pocket of high temperature surrounded by reflective (or at least insulative) material. Thus the heat energy will stay trapped in that area, rather than leaving via the flue/chimney.

Shopping for high-cone clay turned out to be the hardest part. I knew I was going to be pushing all sorts of temperature boundaries in the pocket, so I didn't want to mess with something that would melt, slag, or droop below that. Unfortunately, my local bigbox stores, craft stores, and even school supply stores didn't carry anything beyond air- or oven- dry clay. I went to a couple of the boutique paint-your-own pottery places, and although they sometimes sell clay, they had none. Even the specialist art supply place on the edge of town only occasionally carried pottery clay, and that was neither high-cone nor in stock. Much gas wasted driving around, so I returned home and started calling around.

In fact the nearest place that was open and selling cone-10 clay was the student store at a college about an hour's drive out of town. Happily, they were dumping their stock at the end of the semester, and had 35-40 kilos at "sub cost" prices. Whee!

OK, so now I have clay, but I'm no potter, so I have no idea what I'm doing as far as construction, drying time, firing time/temp, etc. A quick browse through the internet does not reveal much in the way of "how long do you let a 5cm thick wall of clay dry before you fire it?". Most of the instructions are for dainty little teacups or objets d'art. The five large cubes of clay made me bold, and I decided to just forge ahead. (No pun intended)

First layer
Second layer
Third Layer
Fourth and fifth layers
Inside view, after smoothing

Basically I started with a tight little horseshoe shape, built on that, then closed the tuyere at the top, and built it up a bit taller.

When I was done, I realized that I had expanded the internal volume considerably beyond what I had originally intended, so I sliced (vertically) a couple of chunks out of the sides, dampened the edges, and stuck them back together firmly. While I fully expected this to result in faults during firing, this did not happen: apparently working the edges enough resulted in a good "weld". The removed clay I placed on top again, making the stack still taller.

Finally I wet my hands a bit, and smoothed and compressed all the surfaces. Yes, smooth is a relative term, but I reasoned that reducing the surface area would increase heat reflection and decrease heat absorption. Likewise, the opportunity to compress the sides together would hopefully knead out any larger air pockets. This was by far the quickest part of the build.

So now I have this... er... thing. I know it's got a lot of water content: I didn't add water to the clay out of the box, but it was still pliable, so its water content was not zero, and I did wet my hands for the smoothing effort, and the clay drank that water in.

Looking up drying times on the web, I get a variety of answers: from 36 hours in Arizona to ten days in Minnesota. Since I'm leaving on a trip in four days (on April 28) I decide to try for three days. Moving this (base + forge) off my patio and into the relative dry of my apartment was a big job, and bringing it out again was going to be another one. Happily, family and friends were understanding enough to help.

New platform for builds

In the previous post, I wondered about building a forgelet inside my chiminea. After evaluating some of the dimensions involved, I thought this would be a problem, given the limiting size of the "mouth".


So I decided to take a different route. One sunny day in mid-April saw me on another building spree: No matter what I eventually designed, I was going to need to build it somewhere, and a platform of some sort would be needed. A standing garden firepit kit, sand, and firebricks formed the base. A full sized fire extinguisher bottle was also called for.


Fireproof, sturdy, and good defense against high temperatures.

Onwards!