Hammered Out Bits continues to provide good iron smelting data at a tremendous rate.
Lee Sauder and Skip Williams have a good page of iron smelting links at The Rockridge Bloomery. (Mel Brooks movie quotations aside)
The Early Mines Research Group has an ongoing smelting effort as well, check out the "experimental archeaology" and members-projects links.
It looks like a lot of different people are (or recently have been) interested in early metal smelting re-creation, and I would love it if whoever catches the bug next had an easier time finding resources than I did, so please: send me your references.
Monday, June 28, 2010
Sunday, June 27, 2010
Kindred Spirits
Some other folks are thinking along the same lines here, and I wanted to put up some links to their work as well.
GrendelFish aka Matthew Dockrey recorded a couple of copper smelting expirments (experiment 1 , experiment 2)
Tim Young at GeoArch has been running experiments and recording data for a succession of iron smelting efforts from 1998 through 2007.
Paul French is starting a wikipedia entry that looks very promising.
Butser Ancient Farm has their 2010 workshops posted, and Making Metals with Fergus Milton on August 14 looks pretty interesting.
See something else that needs to be on this list? Let me know!
Thursday, June 17, 2010
Think like an engineer: Cheat!
Faced with several smelting failures, I decided to apply one of the sacred tenets of practical engineering taught to me by my father: "When it won't work, cheat". I swapped out the clay forge for one made of loose-stacked firebricks, solving my spalling and insulation problems at a single blow. I was confident charcoal with forced air could get me the temperature I needed if I got a working geometry for the forge. Here's what I ended up with:
[edit post to add picture here]
Additionally a more knowledgeable copper smelter from the other side of the Atlantic Ocean, gave me some good advice about how to test for what was going wrong. (Thank you Fergus!) Armed with this information, and general his encouragement, I took another shot.
On Wednesday, 16 Jun, 2010, I completed my first copper smelt. Here's a short (and very self-important) video of the results.
I plan to do another smelt tomorrow, on a slightly larger scale, so I'll take pictures and video, and post them.
Tuesday, June 1, 2010
Stack furnace v1.0: high firing
Not to ruin the ending for you, but this is where stack furnace 1.0 started to go south. The previous day I had run two wood fires through to burnout in the forge, with no ill effects. Today I planned to do charcoal and forced air. While I had purchased bellows for this purpose, an acquaintance suggested that I just get a heat gun and some dryer duct from the hardware store, and start with that. Being short on time before my trip, I decided to go the surer route, and bought the gear.


Well, I was ready for my vacation anyway :)
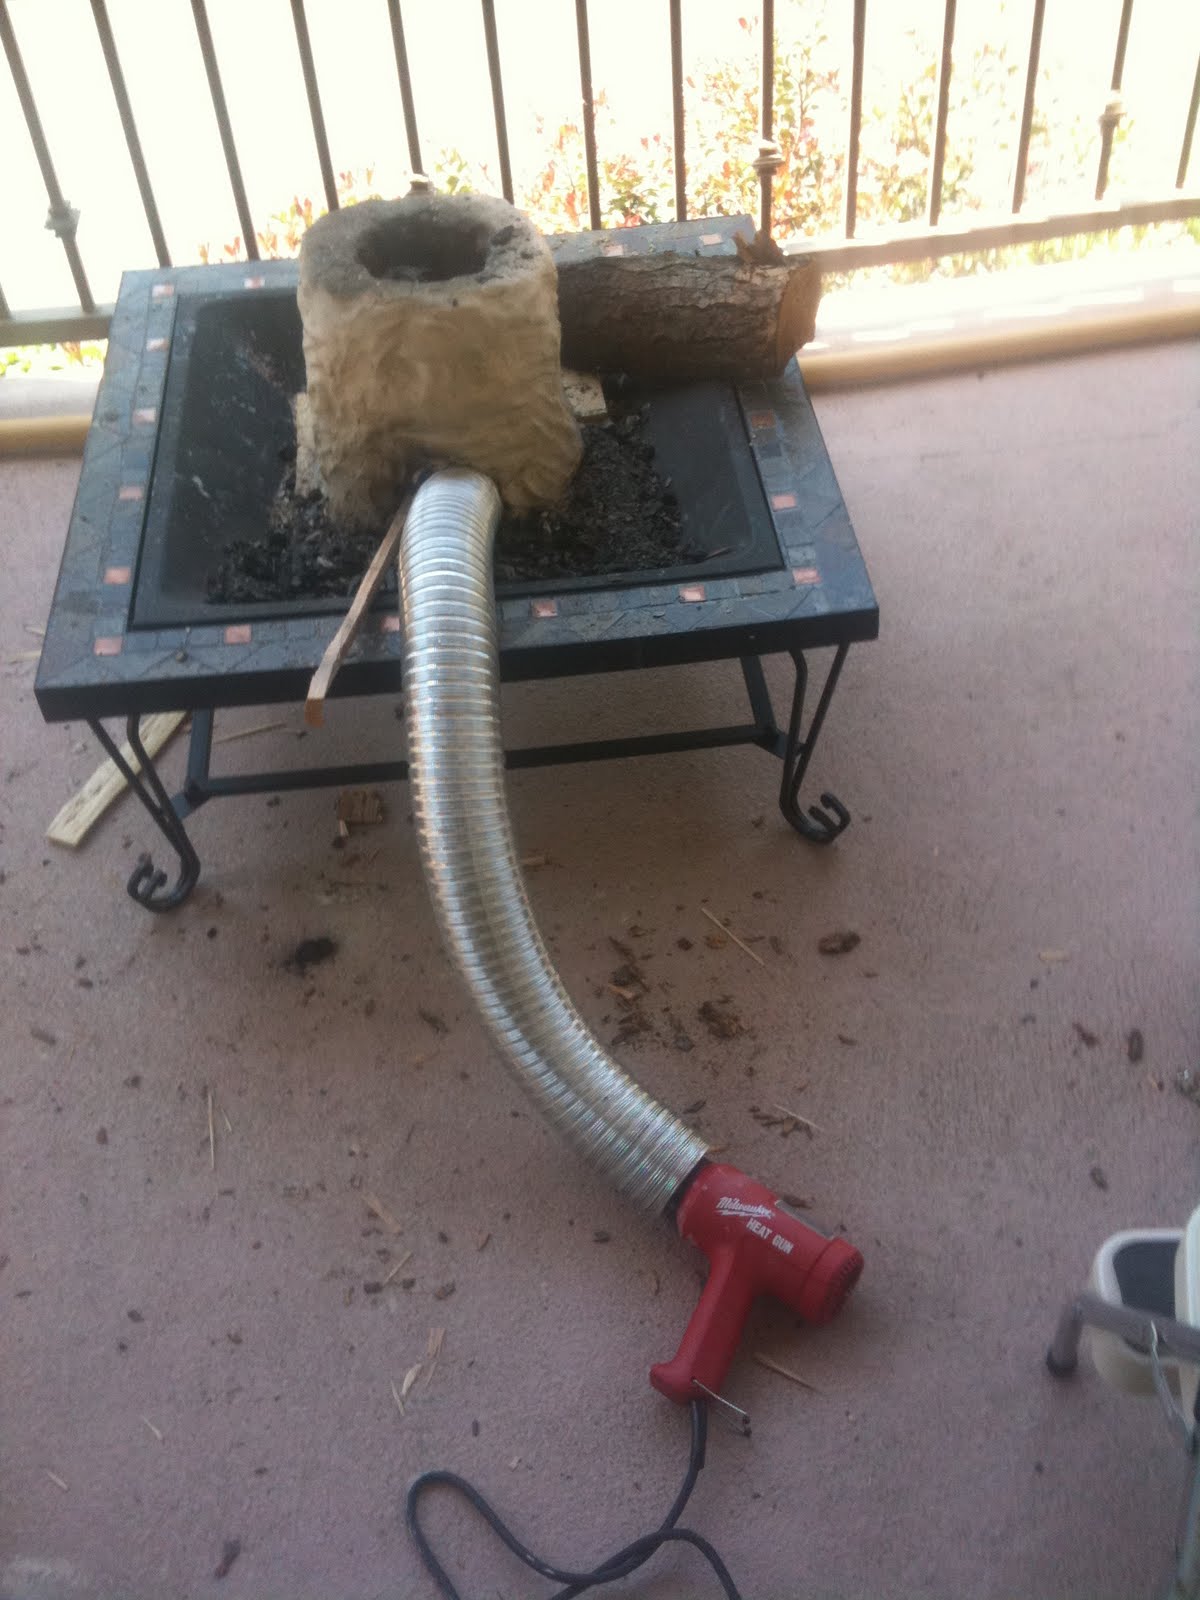

The setup turned out to be quite easy. I loaded the furnace to the brim with charcoal, lit the pile from the bottom, used a wooden wedge to keep the duct in the tuyere, and sat down to watch, periodically removing the vent to reload the charcoal.
At the beginning of the first reload, I began to hear a curious sound, a lot like popcorn popping. Those more knowledgeable readers will be wincing right now, but after checking that there were no cracks or faults developing, I assumed it was some impurity in the charcoal and blithely continued. The next odd symptom was that the ash didn't seem to be burning as completely. There was a large accumulation of unburned crap in the bottom of the forge, and it continued to grow as I fed more charcoal into it.
The third symptom was clear, however: the edges of the tuyere cracked and widened it to about 200% (and later 300%) of its original size, causing the duct to drop out. At this point, with the better view into the forge afforded by the (now quite large) tuyere, I could see that the accumulation of "ash" was actually an accumulation of spalled clay. The popping noises were caused by fire-hardened clay cracking off as less hard (and still wet) clay behind it generated steam and popped it off.
The clay body was still too wet, and I was eroding my forge from the inside out. Below are some pictures of the whole thing, the inside, and a close up of one "edge" of the tuyere
 |  |  |
Well, I was ready for my vacation anyway :)
Stack furnace v1.0: low firing
After three days of drying indoors, then getting a good friend to help me get this back onto the patio, I split up some firewood into kindling sticks for the first (low) firing:


Yes, it's on fire, but you can't really see it because the sun was quite bright that day.


My current plan is to build a small fire inside the forge using just some kindling, and let that burn out. When that's cooled a bit, I'll start a second woodfire using logs, and let that burn for a while. A simple wood fire with no forced air isn't going to vitrify the clay, so this is an exercise in driving off water. Again, I can't find much in the way of advice on how to dry thick hunks of clay, so I'm flying blind.
Yes, it's on fire, but you can't really see it because the sun was quite bright that day.


Burn 1 went to completion without a hitch: no spalling of the clay at all, and a nice hard surface resulted on the inside. Round two, with the bigger logs, begins.
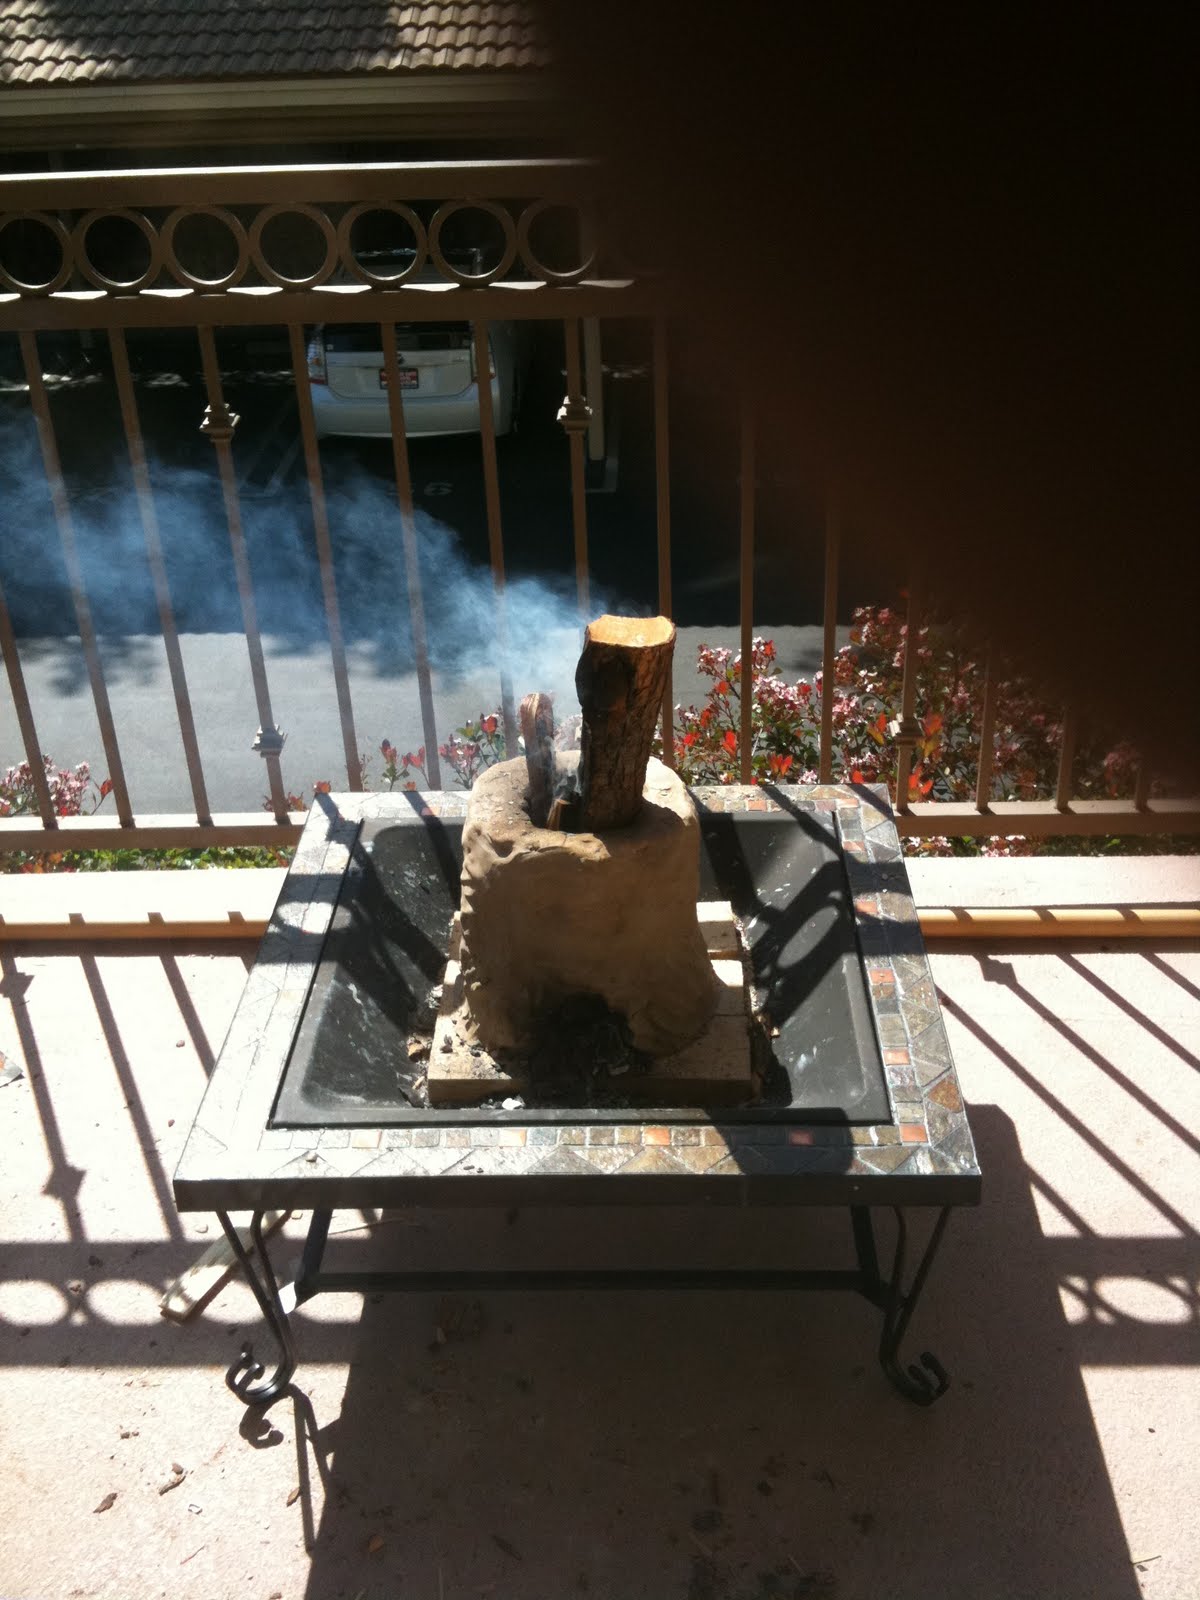

This also went well, although it took a lot longer than I'd hoped. To keep the fire "in" the forge, I had to keep chopping away at the lower parts of the wood to get them out of the way so the fresh (burning) wood was below the top.


As you can see, the second firing went well. There was either a little spalling, or there wasn't any, and I just cleaved off some loose ash/clay when cleaning the coals, but either way, there are no cracks or major cleaves, so I'm ready to move on to the High Firing!
Stack furnace v1.0: The claywork
Now based on several articles, videos, and some photos found online, I've decided to build what I think should be termed a clay stack furnace. I will create a small pocket of high temperature surrounded by reflective (or at least insulative) material. Thus the heat energy will stay trapped in that area, rather than leaving via the flue/chimney.
Shopping for high-cone clay turned out to be the hardest part. I knew I was going to be pushing all sorts of temperature boundaries in the pocket, so I didn't want to mess with something that would melt, slag, or droop below that. Unfortunately, my local bigbox stores, craft stores, and even school supply stores didn't carry anything beyond air- or oven- dry clay. I went to a couple of the boutique paint-your-own pottery places, and although they sometimes sell clay, they had none. Even the specialist art supply place on the edge of town only occasionally carried pottery clay, and that was neither high-cone nor in stock. Much gas wasted driving around, so I returned home and started calling around.
In fact the nearest place that was open and selling cone-10 clay was the student store at a college about an hour's drive out of town. Happily, they were dumping their stock at the end of the semester, and had 35-40 kilos at "sub cost" prices. Whee!
OK, so now I have clay, but I'm no potter, so I have no idea what I'm doing as far as construction, drying time, firing time/temp, etc. A quick browse through the internet does not reveal much in the way of "how long do you let a 5cm thick wall of clay dry before you fire it?". Most of the instructions are for dainty little teacups or objets d'art. The five large cubes of clay made me bold, and I decided to just forge ahead. (No pun intended)
Basically I started with a tight little horseshoe shape, built on that, then closed the tuyere at the top, and built it up a bit taller.
When I was done, I realized that I had expanded the internal volume considerably beyond what I had originally intended, so I sliced (vertically) a couple of chunks out of the sides, dampened the edges, and stuck them back together firmly. While I fully expected this to result in faults during firing, this did not happen: apparently working the edges enough resulted in a good "weld". The removed clay I placed on top again, making the stack still taller.
Finally I wet my hands a bit, and smoothed and compressed all the surfaces. Yes, smooth is a relative term, but I reasoned that reducing the surface area would increase heat reflection and decrease heat absorption. Likewise, the opportunity to compress the sides together would hopefully knead out any larger air pockets. This was by far the quickest part of the build.
So now I have this... er... thing. I know it's got a lot of water content: I didn't add water to the clay out of the box, but it was still pliable, so its water content was not zero, and I did wet my hands for the smoothing effort, and the clay drank that water in.
Looking up drying times on the web, I get a variety of answers: from 36 hours in Arizona to ten days in Minnesota. Since I'm leaving on a trip in four days (on April 28) I decide to try for three days. Moving this (base + forge) off my patio and into the relative dry of my apartment was a big job, and bringing it out again was going to be another one. Happily, family and friends were understanding enough to help.
Shopping for high-cone clay turned out to be the hardest part. I knew I was going to be pushing all sorts of temperature boundaries in the pocket, so I didn't want to mess with something that would melt, slag, or droop below that. Unfortunately, my local bigbox stores, craft stores, and even school supply stores didn't carry anything beyond air- or oven- dry clay. I went to a couple of the boutique paint-your-own pottery places, and although they sometimes sell clay, they had none. Even the specialist art supply place on the edge of town only occasionally carried pottery clay, and that was neither high-cone nor in stock.
In fact the nearest place that was open and selling cone-10 clay was the student store at a college about an hour's drive out of town. Happily, they were dumping their stock at the end of the semester, and had 35-40 kilos at "sub cost" prices. Whee!
OK, so now I have clay, but I'm no potter, so I have no idea what I'm doing as far as construction, drying time, firing time/temp, etc. A quick browse through the internet does not reveal much in the way of "how long do you let a 5cm thick wall of clay dry before you fire it?". Most of the instructions are for dainty little teacups or objets d'art. The five large cubes of clay made me bold, and I decided to just forge ahead. (No pun intended)
| First layer |  |
| Second layer |  |
| Third Layer |  |
| Fourth and fifth layers |  |
| Inside view, after smoothing |  |
Basically I started with a tight little horseshoe shape, built on that, then closed the tuyere at the top, and built it up a bit taller.
When I was done, I realized that I had expanded the internal volume considerably beyond what I had originally intended, so I sliced (vertically) a couple of chunks out of the sides, dampened the edges, and stuck them back together firmly. While I fully expected this to result in faults during firing, this did not happen: apparently working the edges enough resulted in a good "weld". The removed clay I placed on top again, making the stack still taller.
Finally I wet my hands a bit, and smoothed and compressed all the surfaces. Yes, smooth is a relative term, but I reasoned that reducing the surface area would increase heat reflection and decrease heat absorption. Likewise, the opportunity to compress the sides together would hopefully knead out any larger air pockets. This was by far the quickest part of the build.
So now I have this... er... thing. I know it's got a lot of water content: I didn't add water to the clay out of the box, but it was still pliable, so its water content was not zero, and I did wet my hands for the smoothing effort, and the clay drank that water in.
Looking up drying times on the web, I get a variety of answers: from 36 hours in Arizona to ten days in Minnesota. Since I'm leaving on a trip in four days (on April 28) I decide to try for three days. Moving this (base + forge) off my patio and into the relative dry of my apartment was a big job, and bringing it out again was going to be another one. Happily, family and friends were understanding enough to help.
New platform for builds
In the previous post, I wondered about building a forgelet inside my chiminea. After evaluating some of the dimensions involved, I thought this would be a problem, given the limiting size of the "mouth".
So I decided to take a different route. One sunny day in mid-April saw me on another building spree: No matter what I eventually designed, I was going to need to build it somewhere, and a platform of some sort would be needed. A standing garden firepit kit, sand, and firebricks formed the base. A full sized fire extinguisher bottle was also called for.

Fireproof, sturdy, and good defense against high temperatures.
Onwards!
So I decided to take a different route. One sunny day in mid-April saw me on another building spree: No matter what I eventually designed, I was going to need to build it somewhere, and a platform of some sort would be needed. A standing garden firepit kit, sand, and firebricks formed the base. A full sized fire extinguisher bottle was also called for.

 |  |  |
Fireproof, sturdy, and good defense against high temperatures.
Onwards!
Subscribe to:
Posts (Atom)